Call for testing: Google/Huawei Nexus 6P (angler) owners
-
-
-
@kz6fittycent Fogot about the 4 core script. Yes, install TWRP the first time to get factory android installed and running.
-
I fixed my problem.. I was not following the steps properly. I would install twrp then sideload oem 7.1.2 then i would jump right into ubports installer.
i realized i needed to install twrp again after i sideloaded and format the whole drive then ubports worked correctly..
-
@augustblake Yeah the factory installation encrypts your drive ^^
-
Okay - pardon my ignorance with Android devices...
When you say "format whole drive" - what exactly do you mean? Are you using TWRP to format? This isn't wipe partition is it?
BTW, I just double-checked and I HAVE indeed formatted the
/datadrive. So then the question becomes, are there others that need to be formatted? Because the documentation/steps seem to differ depending on the post and definitely within the installer snap. -
Okay - last time and I give up.
Here are the CURRENT steps I am taking as of RIGHT now -
- Flash 7.1.2
- Flash TWRP 4-core
- Perform wipe AND format
/data - Run Installer app
- Select bootstrap stuff and format personal data
- Select
develchannel (actually I've tried them all so I don't think this matters one bit at this point - Begin installation
- BLOD
I am going to just walk away from this thing and let it BLOD endlessly. Sometimes the BLOD will end and get to the recovery. I doubt it though.
JUST TO BE CLEAR-
I have also tried leaving TWRP on there just to see what would happen - nothing. Nothing happened. -
@kz6fittycent Flash 4-core TWRP with script so it doesn't bootloop. Then wipe all partitions in TWRP (data, dalvik, system, cache, etc).
Then install factory 7.1.2, being sure to do the usb debug, MTP, and accept this computer prompt as described above. Then load 4-core TWRP and wipe dalvik, data, and cache
At this point try the installer in recovery, or flash halium, rootfs, etc manually as per instructions above
-
Okay, so, as I mentioned, the manual flash instructions are a hot mess - hard to read and definitely not clear cut. At least the one's I found here: https://pad.ubports.com/p/nexus-6p-alphatesting
I didn't see any others about manual installation. You posted several threads/posts but each one has some difference in the instructions/methods - leading to some confusion and likely issues.
Basically, need something very clear cut - exactly what order things are done and what is done - maybe even with screenshots. I realize that this can be a tall order during the testing phase but in my line of work (dev-ops), I have to clearly outline each step taken in order to determine any deviation that may have occurred on the user's end that would lead to failures or issues. Given the current state, it's kind of all over the place.
Please don't think I'm being a jerk, or overly critical, I'm trying the help the project along and I am going to assume that there is some dummy out there like me facing similar issues.
Now, on to the next bit:
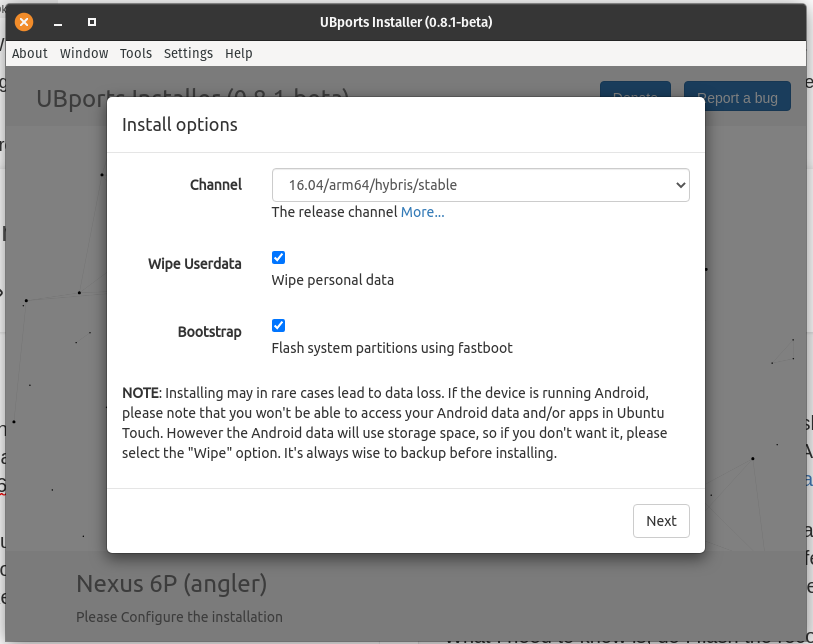
When using the installer, this is what I see (screenshot). What I need to know is, do I tick both blocks in the ubports-installer? See screenshot.

Because if I do, it just BLODs. If I don't tick the bootstrap box, it just fails to load the OS. Basically just quits.
-
@kz6fittycent PM me and I'll try to help you
-
@kz6fittycent are you on windows? ubuntu? i used ubuntu 20.10 and downloaded the .deb form. snap usually is slow and buggy from my experience with brave browser and other apps. i was also having problems with ubports on the snap version. not sure if that helps
-
@augustblake Pop! 20.04 - I'm actually a snap "developer", too. Snaps work fine for me - this one is no exception. The .deb didn't work either. Tried the AppImage, too. Same results.
I think the problem is either the phone or some step that's getting missed or misunderstood on my part.
-
This is where I'm at using the manual setup instructions provided (thanks @rocket2nfinity ).
I: Unmounting images
I: Pushing rootfs and android image to /data via ADB
I:    Pushing rootfs to /data via ADB
adb: error: failed to copy '.halium-install-imgs.RNTTa/rootfs.img' to '/data/rootfs.img': remote couldn't create file: Permission denied
.halium-install-imgs.RNTTa/rootfs.img: 0 fil... pushed. 43.1 MB/s (2752512 bytes in 0.061s)
I:    Pushing android image to /data via ADB
adb: error: failed to copy '.halium-install-imgs.RNTTa/system.img' to '/data/system.img': remote couldn't create file: Permission denied
.halium-install-imgs.RNTTa/system.img: 0 fil... pushed. 59.3 MB/s (2621440 bytes in 0.042s)
Followed this set of instructions:
./halium-install-standalone.sh -p ut ubports-touch.rootfs-xenial-armhf.tar.gz system.img adb reboot bootloader fastboot flash boot halium-boot-8-cores.img fastboot reboot/data,dalvik, andcachewere wiped so I don't know what would cause this.I ran the script with
sudoas I was getting permission denied previous to do anything without it. Should I have su'd toroot?All very odd to me.
-
Alright everyone - I got it.
I was misunderstanding what was being said - this is how I did it:
- Download files needed here
- Flash 7.2.1 (stock ROM from Google)
- Flash 4-core TWRP after flashing stock image
- Boot into android
- Enable USB Debugging in Developer menu < - this wasn't needed because I did the rest via TWRP
- Boot into TWRP
- Wipe dalvik, data, and cache
- Reboot into recovery (TWRP)
- Run manual installation steps:
sudo apt install qemu-utils binfmt-support qemu-user-static e2fsprogs sudo simg2img binutils

cd /path/to/files/

./halium-install-standalone.sh -p ut ubports-touch.rootfs-xenial-armhf.tar.gz system.img

adb reboot bootloader

fastboot flash boot halium-boot-4-cores.img

fastboot reboot
I now have a working installation of UBPorts on my
anglerThanks all!
P.S. I have extra files on my NC server that I needed, including the
4-core.img, the 7.2.1 files from Google, TWRP-4-core and it's associated boot script. - if you need them, I have them. Otherwise, they should all likely be hosted by the team in one spot. -
@kz6fittycent Don't remember how old the image is you used. If your build does not have update channels, running the installer will bring you up to date.
-
@rocket2nfinity said in Call for testing: Google/Huawei Nexus 6P (angler) owners:
@kz6fittycent Don't remember how old the image is you used. If your build does not have update channels, running the installer will bring you up to date.
Do I need to run through the entire installation process again (via the UBports Installer)? It is still giving me grief when trying to push the new update over - did not tick the bootstrap button.
-
@rocket2nfinity said in Call for testing: Google/Huawei Nexus 6P (angler) owners:
@kz6fittycent Don't remember how old the image is you used. If your build does not have update channels, running the installer will bring you up to date.

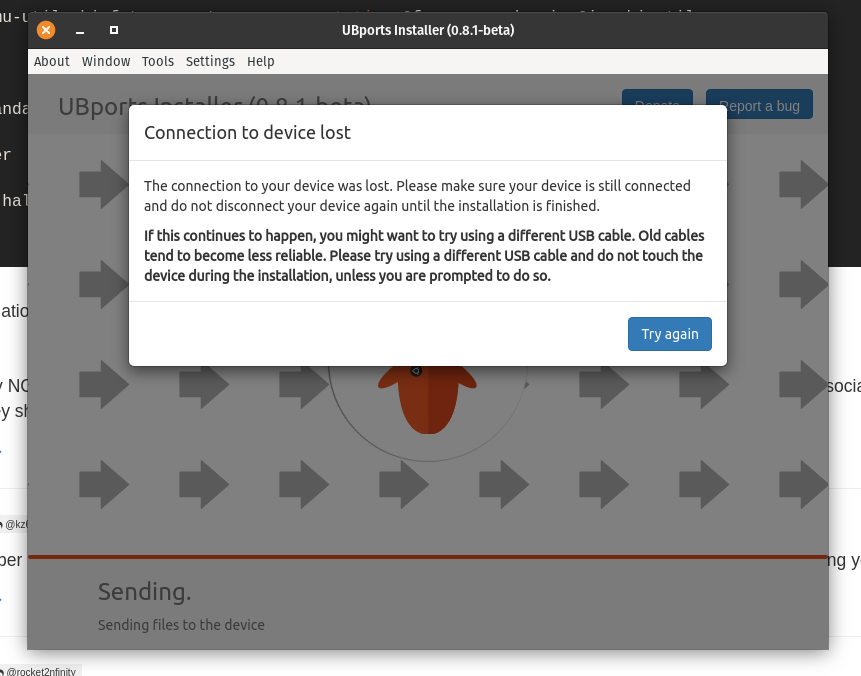
That's the same cable I used to flash it manually - good cable - bad installer?
-
@kz6fittycent That is just odd. The installer worked fine for upgrading for me. I have no idea why you can do it manually, but the installer hangs.
You can update to the latest rootfs manually. Also in the collection of links I posted above. Just flash individuallly with fastboot using the commands I provided you in PM (which you posted).
-
-
@rocket2nfinity PM'd you