Meizu Pro 5 Flyme OS To Ubuntu Touch + modem Update + Fingerprint Function.
-
Meizu Pro 5From Flyme OS to Ubuntu Touch
Please Note, i am not responsible for any break/brick device DO IT AT YOU OWN RISK
This was made on 64GB Pro 5.
If your device is not the international version, is the Chinese version please follow this tutorial to change to international: https://forum.xda-developers.com/meizu-pro-5/how-to/tutorial-change-region-id-to-t3323883/Before all i thanks everybody than can donate, as your donation is important to me and really make a difference.
Donate at: https://paypal.me/rubencarneiro?locale.x=pt_PTStep 1:Unlock Bootloader
Download: https://drive.google.com/file/d/1SpPqSFQ0b7thvs_f2VqexDxQTBK6bQP5/view?usp=sharing
Rename to update.zip and put inside your device storage.
Rebooot to recovery pressing Volume up + Power and choose "System Upgrade"
Unlock Bootloader 2nd Method: https://drive.google.com/file/d/1U09dVhiBJebPMwQ1q99R2RzBC8hErLuI/view?usp=sharing
Just rename the file to update.zip put in your internal storage go to recovery and update.
Now your device has an unlocked bootloader.Step 2: Flash TeamwinRecovery
Download: https://drive.google.com/file/d/1T30ug5TQqzRxZiKsFk3IhpR5c218N4Pc/view?usp=sharing
Reboot the device to fastboot pressin Volume Down + Power
Open a terminal and do the command:fastboot flash recovery TWRP_3.0_m86.imgNow reboot to recovery.
Step 3: Restore Ubuntu Backup
Download: https://drive.google.com/file/d/1aN8A7N79IfEJ0mPZBDNjP8woHnE-NNiG/view?usp=sharing
Extract the files.
Now Inside your device storage should be a folder called TWRP if is now Just create one or reboot again to recovery it will create one.
Inside the TWRP Folder create one called "BACKUPS", Inside BACKUPS create one called "M86" and copy the extrcted folder "Ubports_ota1" inside M86.
You shouldhave this:" /TWRP/BACKUPS/M86/Ubports_ota1"
Now on recovery go to restore and select the Ubuports_ota1 folder and restore everything.
Once you restore reboot to bootloader is time for step 4.Step 4: Modify partitions size using fdisk.
Once you rebooted to recovery is time to hack the device so open a terminal and do the following commands:adb shellmount /dev/block/sda41 /system mount -t proc proc /system/proc mount -t sysfs sys /system/sys mount -o bind /dev /system/dev chroot /system /bin/bashfdisk /dev/block/sdaYou should see:
Welcome to fdisk (util-linux 2.25.2).
Changes will remain in memory only, until you decide to write them.
Be careful before using the write command.


Command (m for help):
Now input p:
and you should see something Like this, this is my modified partition table:
Disk /dev/block/sda: 58.2 GiB, 62537072640 bytes, 15267840 sectors
Units: sectors of 1 * 4096 = 4096 bytes
Sector size (logical/physical): 4096 bytes / 16384 bytes
I/O size (minimum/optimal): 16384 bytes / 8192 bytes
Disklabel type: gpt
Disk identifier: 00042021-0408-4601-9DCC-A8C51255994F

Device             Start      End  Sectors  Size Type
/dev/block/sda1     1024     1279      256    1M Microsoft basic data
/dev/block/sda2     1280     1343       64  256K Microsoft basic data
/dev/block/sda3     1344     1407       64  256K Microsoft basic data
/dev/block/sda21    2048     3071     1024    4M Microsoft basic data
/dev/block/sda22    3072     5119     2048    8M Microsoft basic data
/dev/block/sda23    5120     5631      512    2M Microsoft basic data
/dev/block/sda24    5632     6655     1024    4M Microsoft basic data
/dev/block/sda25    6656     7679     1024    4M Microsoft basic data
/dev/block/sda26    7680    13823     6144   24M Microsoft basic data
/dev/block/sda27   13824    22015     8192   32M Microsoft basic data
/dev/block/sda28   22016    30207     8192   32M Microsoft basic data
/dev/block/sda29   30208    35327     5120   20M Microsoft basic data
/dev/block/sda30   35328    40447     5120   20M Microsoft basic data
/dev/block/sda31   40448    45567     5120   20M Microsoft basic data
/dev/block/sda32   45568    50687     5120   20M Microsoft basic data
/dev/block/sda33   50688    55807     5120   20M Microsoft basic data
/dev/block/sda41   65536   720895   655360  2.5G Microsoft basic data
/dev/block/sda42  720896   851967   131072  512M Microsoft basic data
/dev/block/sda43  851968  1376255   524288    2G Microsoft basic data //This what we need to change
/dev/block/sda44 1376256 15267834 13891579   53G Microsoft basic data
I gave my cache partition a 2GB space.
d= delete partition
n= new partition
x= advanced optionsso first let's delete the partiotions
Commands:d //delete 43 //partition number d //delete 44 //partition numberNow let's create a e new ones:
n // new partition
43 //partition number
hit enter // hit at at first cylinder option
+2G // this will difine your partition to 2048MB/2GB
n // new partition
44 //partition number
hit entter the 2 times so it will create a partition with the remaining space.
x // go to advanced options
n // name partition
43 //partition number
cache //partition name
n // name partition
44 //partition number
userdata //partition name
p //print partitions
Now if print partitions you will have something like this:
Expert command (m for help): p
Disk /dev/block/sda: 58.2 GiB, 62537072640 bytes, 15267840 sectors
Units: sectors of 1 * 4096 = 4096 bytes
Sector size (logical/physical): 4096 bytes / 16384 bytes
I/O size (minimum/optimal): 16384 bytes / 8192 bytes
Disklabel type: gpt
Disk identifier: 00042021-0408-4601-9DCC-A8C51255994F
First LBA: 6
Last LBA: 15267834
Alternative LBA: 15267839
Partitions entries LBA: 2
Allocated partition entries: 128

Device             Start      End  Sectors Type-UUID                            UUID                                 Name      Attrs
/dev/block/sda1     1024     1279      256 EBD0A0A2-B9E5-4433-87C0-68B6B72699C7 D117F98E-6F2C-D04B-A5B2-331A19F91CB2 private
/dev/block/sda2     1280     1343       64 EBD0A0A2-B9E5-4433-87C0-68B6B72699C7 25718777-D0AD-7443-9E60-02CB591C9737 proinfo
/dev/block/sda3     1344     1407       64 EBD0A0A2-B9E5-4433-87C0-68B6B72699C7 8A4BB8B4-E304-AE48-8536-AFF5C9C495B1 misc
/dev/block/sda21    2048     3071     1024 EBD0A0A2-B9E5-4433-87C0-68B6B72699C7 08992135-13C6-084B-9322-3391FF571E19 param
/dev/block/sda22    3072     5119     2048 EBD0A0A2-B9E5-4433-87C0-68B6B72699C7 333A128E-D3E3-B94D-92F4-D3EBD9B3224F efs
/dev/block/sda23    5120     5631      512 EBD0A0A2-B9E5-4433-87C0-68B6B72699C7 F20AA902-1C5D-294A-9177-97A513E3CAE4 pnv
/dev/block/sda24    5632     6655     1024 EBD0A0A2-B9E5-4433-87C0-68B6B72699C7 DB88503D-34A5-3E41-836D-C757CB682814 ldfw
/dev/block/sda25    6656     7679     1024 EBD0A0A2-B9E5-4433-87C0-68B6B72699C7 012B3303-34AC-284D-99B4-34E03A2335F4 dtb
/dev/block/sda26    7680    13823     6144 EBD0A0A2-B9E5-4433-87C0-68B6B72699C7 FAEC2ECF-8544-E241-B19D-757E796DA607 bootimg
/dev/block/sda27   13824    22015     8192 EBD0A0A2-B9E5-4433-87C0-68B6B72699C7 F13A0978-B1B5-1A4E-8821-39438E24B627 recovery
/dev/block/sda28   22016    30207     8192 EBD0A0A2-B9E5-4433-87C0-68B6B72699C7 B710EB04-45B9-E94A-8D0B-21458D596F54 bootlogo
/dev/block/sda29   30208    35327     5120 EBD0A0A2-B9E5-4433-87C0-68B6B72699C7 AD5EC4B6-2D9F-8544-9417-FE3BD1C9B1B3 rstinfo
/dev/block/sda30   35328    40447     5120 EBD0A0A2-B9E5-4433-87C0-68B6B72699C7 CCEB0B18-39CB-D547-9DB7-03B405FA77D4 mnv
/dev/block/sda31   40448    45567     5120 EBD0A0A2-B9E5-4433-87C0-68B6B72699C7 D4981A2B-0478-544E-9607-7FD3C651068D reserved1
/dev/block/sda32   45568    50687     5120 EBD0A0A2-B9E5-4433-87C0-68B6B72699C7 6D6C9A36-E919-264D-A9EE-BD00379686C7 reserved2
/dev/block/sda33   50688    55807     5120 EBD0A0A2-B9E5-4433-87C0-68B6B72699C7 60B98C0E-BEAD-B043-9CC6-5BD4E026D14A reserved3
/dev/block/sda41   65536   720895   655360 EBD0A0A2-B9E5-4433-87C0-68B6B72699C7 ED05FE7B-3CD3-CC41-ADAF-BE8E55B00591 system
/dev/block/sda42  720896   851967   131072 EBD0A0A2-B9E5-4433-87C0-68B6B72699C7 8C707F9D-1317-45AB-9DBA-5682047A7DBE custom
/dev/block/sda43  851968  1376255   524288 0FC63DAF-8483-4772-8E79-3D69D8477DE4 FECC2A45-68FE-46DF-BE7C-1928A0DA8ADE cache
/dev/block/sda44 1376256 15267834 13891579 0FC63DAF-8483-4772-8E79-3D69D8477DE4 B000A2AF-DBF8-4F82-AC35-8C14AFEA4F33 userdata
r // return to main menuNow if you run the p commando you will notice that the last partions are not there take a look:
Command (m for help): p
Disk /dev/block/sda: 58.2 GiB, 62537072640 bytes, 15267840 sectors
Units: sectors of 1 * 4096 = 4096 bytes
Sector size (logical/physical): 4096 bytes / 16384 bytes
I/O size (minimum/optimal): 16384 bytes / 8192 bytes
Disklabel type: gpt
Disk identifier: 00042021-0408-4601-9DCC-A8C51255994F

Device             Start      End  Sectors  Size Type
/dev/block/sda1     1024     1279      256    1M Microsoft basic data
/dev/block/sda2     1280     1343       64  256K Microsoft basic data
/dev/block/sda3     1344     1407       64  256K Microsoft basic data
/dev/block/sda21    2048     3071     1024    4M Microsoft basic data
/dev/block/sda22    3072     5119     2048    8M Microsoft basic data
/dev/block/sda23    5120     5631      512    2M Microsoft basic data
/dev/block/sda24    5632     6655     1024    4M Microsoft basic data
/dev/block/sda25    6656     7679     1024    4M Microsoft basic data
/dev/block/sda26    7680    13823     6144   24M Microsoft basic data
/dev/block/sda27   13824    22015     8192   32M Microsoft basic data
/dev/block/sda28   22016    30207     8192   32M Microsoft basic data
/dev/block/sda29   30208    35327     5120   20M Microsoft basic data
/dev/block/sda30   35328    40447     5120   20M Microsoft basic data
/dev/block/sda31   40448    45567     5120   20M Microsoft basic data
/dev/block/sda32   45568    50687     5120   20M Microsoft basic data
/dev/block/sda33   50688    55807     5120   20M Microsoft basic data
/dev/block/sda41   65536   720895   655360  2.5G Microsoft basic data
/dev/block/sda42  720896   851967   131072  512M Microsoft basic data
/dev/block/sda43  851968  1376255   524288    2G Linux filesystem  // this should be Microsoft basic data
/dev/block/sda44 1376256 15267834 13891579   53G Linux filesystem  // this should be Microsoft basic data
command t:
t // change a partition type
43 //partition number
6 // Microsoft basic data partition type
t // change a partition type
44 //partition number
6 // Microsoft basic data partition type
Now run again command p you will get:
Command (m for help): p
Disk /dev/block/sda: 58.2 GiB, 62537072640 bytes, 15267840 sectors
Units: sectors of 1 * 4096 = 4096 bytes
Sector size (logical/physical): 4096 bytes / 16384 bytes
I/O size (minimum/optimal): 16384 bytes / 8192 bytes
Disklabel type: gpt
Disk identifier: 00042021-0408-4601-9DCC-A8C51255994F

Device             Start      End  Sectors  Size Type
/dev/block/sda1     1024     1279      256    1M Microsoft basic data
/dev/block/sda2     1280     1343       64  256K Microsoft basic data
/dev/block/sda3     1344     1407       64  256K Microsoft basic data
/dev/block/sda21    2048     3071     1024    4M Microsoft basic data
/dev/block/sda22    3072     5119     2048    8M Microsoft basic data
/dev/block/sda23    5120     5631      512    2M Microsoft basic data
/dev/block/sda24    5632     6655     1024    4M Microsoft basic data
/dev/block/sda25    6656     7679     1024    4M Microsoft basic data
/dev/block/sda26    7680    13823     6144   24M Microsoft basic data
/dev/block/sda27   13824    22015     8192   32M Microsoft basic data
/dev/block/sda28   22016    30207     8192   32M Microsoft basic data
/dev/block/sda29   30208    35327     5120   20M Microsoft basic data
/dev/block/sda30   35328    40447     5120   20M Microsoft basic data
/dev/block/sda31   40448    45567     5120   20M Microsoft basic data
/dev/block/sda32   45568    50687     5120   20M Microsoft basic data
/dev/block/sda33   50688    55807     5120   20M Microsoft basic data
/dev/block/sda41   65536   720895   655360  2.5G Microsoft basic data
/dev/block/sda42  720896   851967   131072  512M Microsoft basic data
/dev/block/sda43  851968  1376255   524288    2G Microsoft basic data
/dev/block/sda44 1376256 15267834 13891579   53G Microsoft basic data
w = save and exit
w // save the changes and exitreboot to recovery and wipe all partitions.
Problems with partititions:
go to fastboot:fastboot erase cache fastboot erase userdataStep 5: Install Ubuntu Touch
Reboot to bootloader.
open terminal and run:sudo ubuntu-device-flash --server=http://system-image.ubports.com touch --device=turbo --channel=ubports-touch/16.04/devel --bootstrap --wipeYou will get error " cant boot to recovery", okey dont manually boot to recovery yet.
Download: https://drive.google.com/file/d/1HXBRizZvGF_-HAXsSVwjxfZU5vXN-k6b/view?usp=sharingCommand:
fastboot flash recovery recovery-turbo.imgReboot to recovery and do the following command.
Command:sudo ubuntu-device-flash --server=http://system-image.ubports.com touch --device=turbo --channel=ubports-touch/16.04/devel --wipeWait to Finish and Voilá. Congratilations now you have ubuntu touch capable of updating.
Updating the modem:
Download: https://drive.google.com/open?id=1YpPhvk-hnVv0EUYKpjChH1T4m_vVEVu1
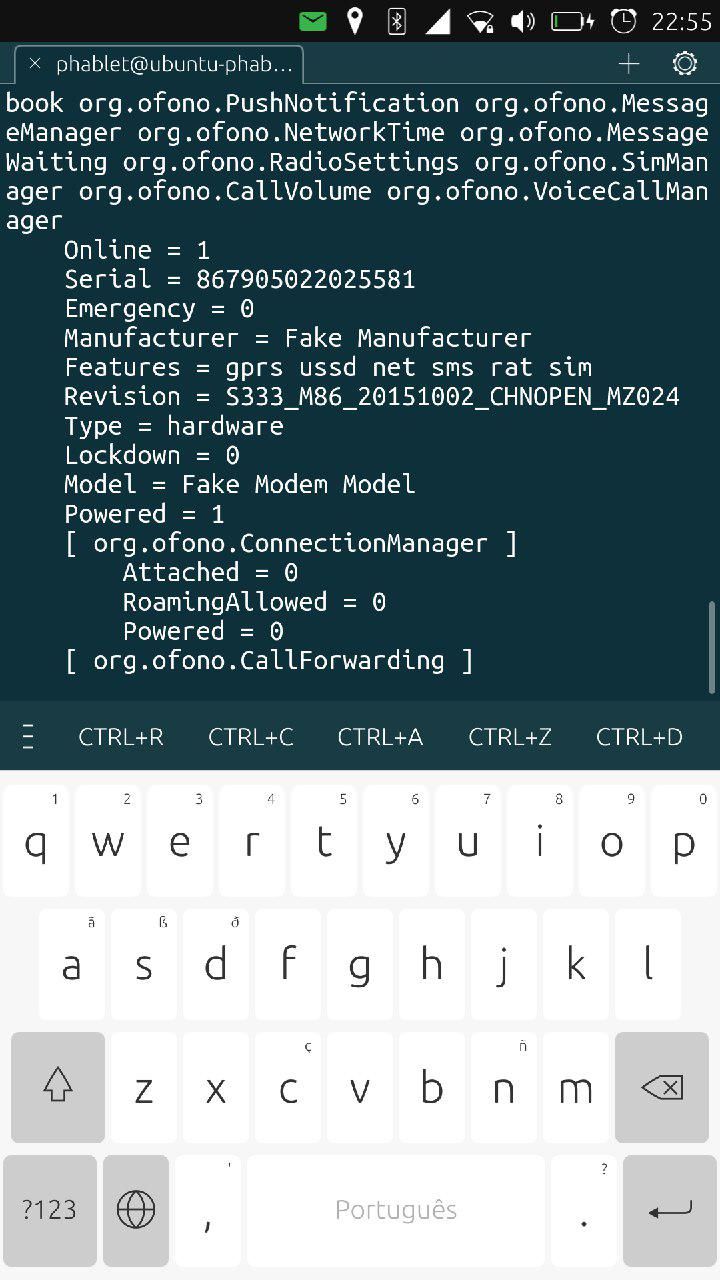
Put modem.bin on your device Downloads Folder.Check current modem:
open device terminal./usr/share/ofono/scripts/list-modemsScroll up >The Revision should be something like this:
In terminal:
sudo -i
mount -o remount,rw /
cp /var/lib/lxc/android/system.img /home/phablet
cd /home/phablet
mkdir system
mount -o loop system.img system
cd system/vendor/firmware/
rm modem.bin
cp /home/phablet/Downloads/modem.bin ./
chmod 644 modem.bin
cd /home/phablet
umount system
mv /var/lib/lxc/android/system.img /var/lib/lxc/android/system.img.old
cp system.img /var/lib/lxc/android/
reboot
Now if you check again: it looks like this:
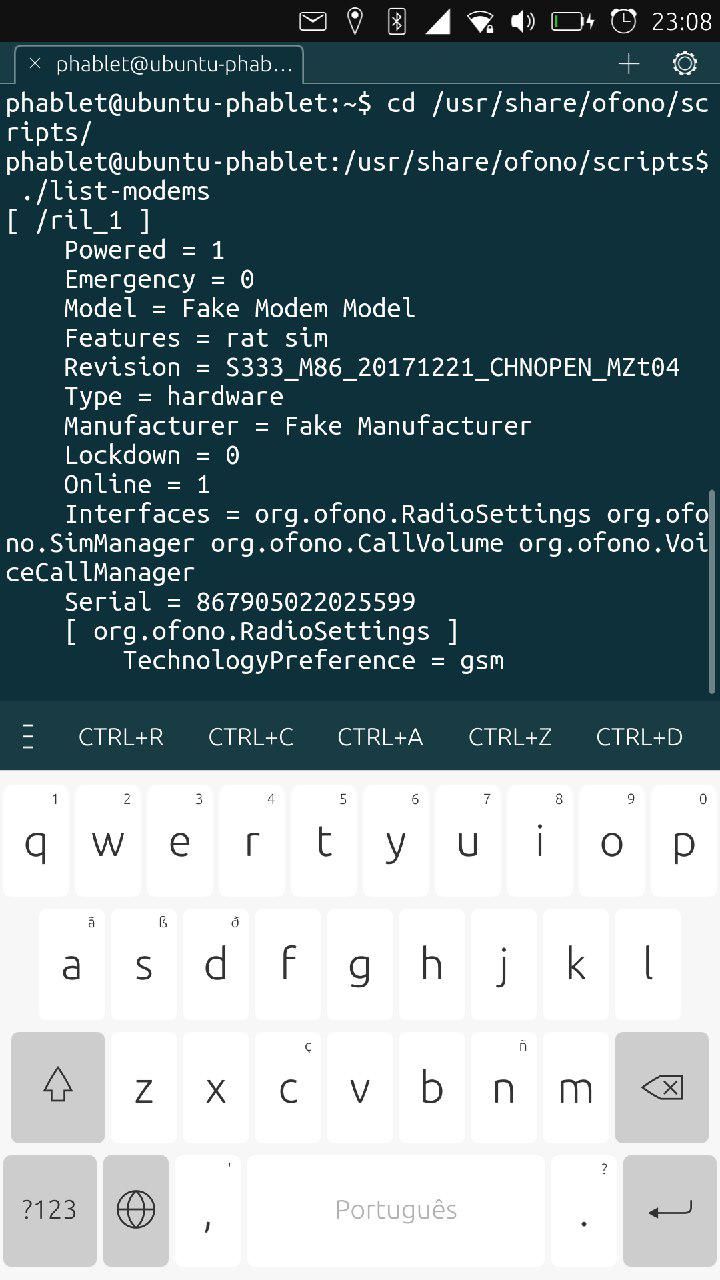
Its Updated.
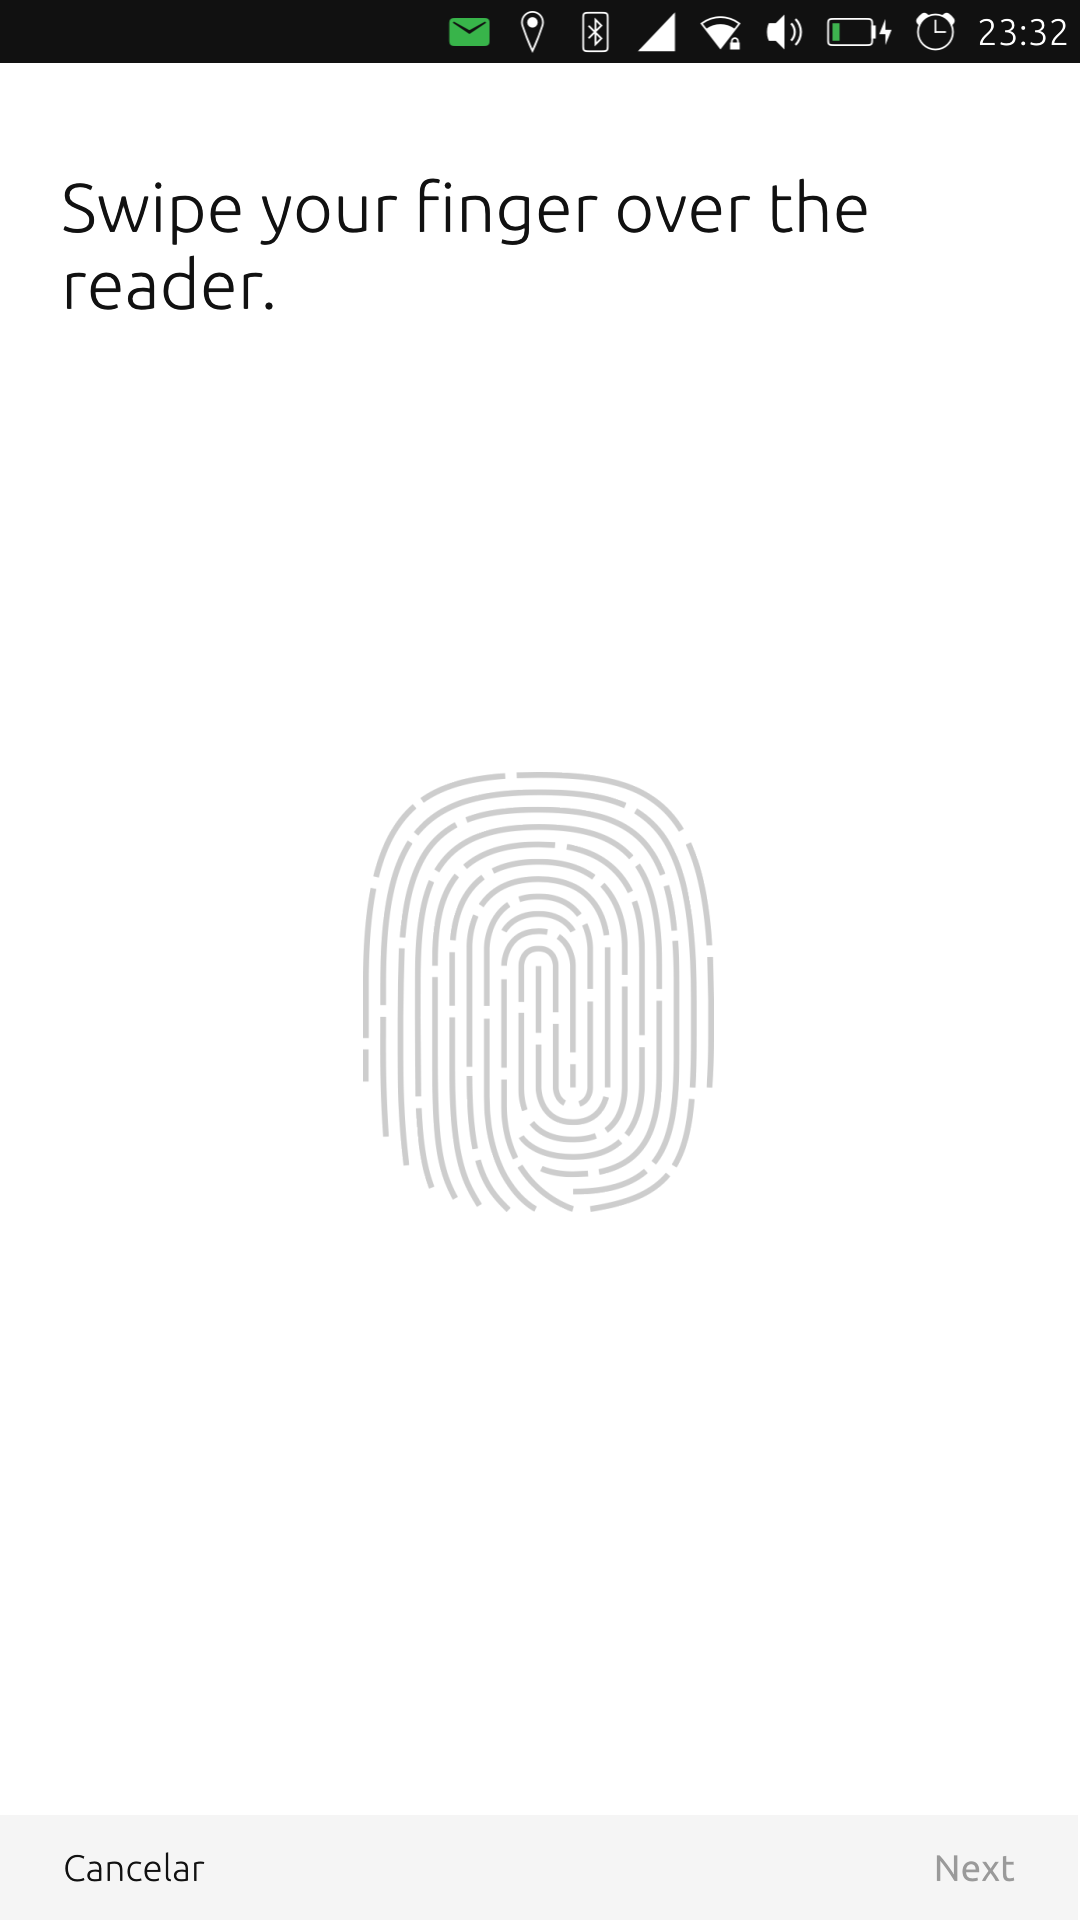
Enable Fingerprint:
Download: https://drive.google.com/open?id=1OJ7JUBFIExPVV48_1VwO_HcTcYmXaBVN
Copy the fingerprint.sh to Downloads Folder
open terminal:sudo -s cd /Downloads chmod +x fingerprint.sh ./fingerprint.shWait until is finish , then CTRL+C
and on terminal type:rebootThen:
A Thanks to AlainW94 on github for the solution: https://github.com/ubports/ubuntu-touch/issues/396
And To @Sconio to broght this to my atention and provide some resources and testing.Thanks
")
As always yo can find me on telegram @rubencarneiro or on Fluffychat @rubencarneiro.
If you can please donate. -
Has anyone done this with the Chinese edition?
-
Not this exact method but I have installed UBports Ubuntu Touch onto a Chinese Pro 5 myself, so know that it is possible.
Nexus4, Meizu MX4, Meizu Pro5, PinePhone UBPorts edition, PineTab, Pixel 3a XL
-
@Diogo is easy to change from unicórnio (chineses) to internation follow this toturial https://forum.xda-developers.com/meizu-pro-5/how-to/tutorial-change-region-id-to-t3323883/.
-
@Diogo Chinese edition you meant Chinese Flyme software, or TD-lte hardware version? Both is possible, just be sure TD-lte hardware version is compatible with 4g frequencies your mobile carrier uses. (international hardware version is FD-lte or LTE only and is better supported by mobile carriers)
-
@halucigenia how have you done it?
-
@rubencarneiro Thanks! For that will try it as soon as I've some free time!
-
Wonderful post, i just tried yestarday and all works ok, I change "Step 5: Install Ubuntu Touch" and use directly ubports-install software, even, it works second time i do, on first time i get stucked on bootloop, but it's a very good howto for Meizu pro 5 (Chinese version) with Android
-
@rubencarneiro great job Ruben....I see you are on fire with the Meizu Pro 5...here's my proposal: what about the issues described in this Forum post? The issues seem to be related to the fact that the Meizu Pro 5 "TD-LTE" version apparently isn't exactly the same device as the original MP5, the Canonical model to be clear. We made some progress in this regards, but no ultimate resolution up to now. What I found out to "resolve" the wi-fi issue was incidentally the installation of Anbox; maybe the kernel update was beneficial, I don't know. Do you have any clue? If you could help me and the other people with this model, we would appreciate a lot....I will definitely think about a donation to you for your work
Matteo
-
@rubencarneiro amazing work @rubencarneiro , thanks for that script. Does this need to be done after every update?
-
@Stefano AFAIK it should remain. But yeah, Ruben is the right guy to answer
")
-
@Stefano no the scripy pu the package on hold so it cannot be updated.
you can do your updates safely. -
@rubencarneiro I just switched channel to Devel and fingerprint function is gone. Normal switching on phone, not by installer or manually.
-
@Stefano It doesn't matter. Switching channels is a full flash of the rootfs, so changes made to the rootfs will be overwritten.
-
@dobey Ahh, ok then, did not know that. Thanks for the clarification.
-
Hi,
I have an International Meizu PRO 5 32Gb
Everything worked, except STEP 5 (I'm not sure why).
My Alternative Step 5 was (thank to Matteo in the UBports Welcome & install group on telegram):
- download the appImage: https://github.com/ubports/ubports-installer/releases/tag/0.2.6-beta (this specific version/binary)
cd ~/Downloadschmod +ax ubportsinstaller.appImage- switch phone to fastboot (
adb reboot fastbootor just hold[Volume down] + [power] sudo ./ubportsinstaller.appImage- Ignore the ubports installer about more recent version
- Select
16.04, thendevelorstablefor example, thenwipe, and continue - keep following instructions
- tadaa \o/
And any other steps worked !
Thank you very much for your work !!!
-
@arudy Welcome back!
-
Can you explain why you offer for download your files? I need open source or more verification files. Thanks
-
@matteo Hi, Mine is a TD-LTE Version.
-
@rubencarneiro do you have any issue as for instance the lack of automatic connection to the wi-fi Access Point at phone start-up? Every time, I need to manually re-instate the credentials to my home wi-fi to get connected to it.
Hello! It looks like you're interested in this conversation, but you don't have an account yet.
Getting fed up of having to scroll through the same posts each visit? When you register for an account, you'll always come back to exactly where you were before, and choose to be notified of new replies (either via email, or push notification). You'll also be able to save bookmarks and upvote posts to show your appreciation to other community members.
With your input, this post could be even better 💗
Register Login