[GUIDE] X Forwarding from Ubuntu Touch to Windows Desktop (via USB/WIFI)
-
This is a simple guide on how you can run x apps installed on your UT device on your Windows desktop.
Thanks to Kris Jace (from the UBports Supergroup) for the blogs about UT stuffs including X forwarding.
I'm not good at explaining things and I won't be detailing this that much so bear with me")
Requirements:
- Windows OS....I only tried Windows 7 and 10 but most likely it'll work in Windows 8 as well.
- PuTTY (free)
- Xming (free)
- X apps installed on your UT device (I won't cover this. You may check http://kriscode.blogspot.com)
Steps:
-
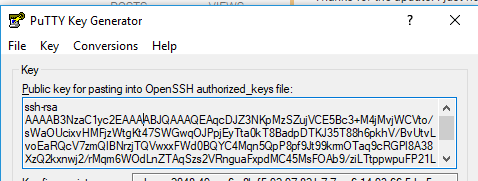
Run PuTTYgen and click Generate.
-
Follow the instruction and after it's done, click "Save private key" and save anywhere you like.
-
Now copy all the texts inside the "Key" box. Paste it in a temporary text file.
-
Paste the text you've just stored in a temporary text file to the file "/home/.ssh/authorized _keys" ON YOUR DEVICE. I'll leave it to you how
")
Those steps are done to authenticate your PC with your UT device for SSH.
-
You may now close PuTTYgen and open PuTTY. Under Connection >> SSH >> Auth, browse for the private key you've saved in step 2.
-
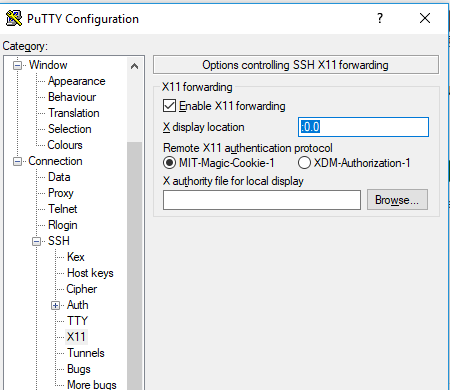
Under, Connection >> SSH >> X11, check "Enable X11 forwarding" then put ":0.0" in the X display location.
-
Now on your device, if you want to do it via USB then enable RNDIS, you can do this in UT Tweak Tool or by running "android-gadget-service enable rndis". This will disable MTP/file transfer via USB. After this, connect your phone to your desktop via USB cable. Your desktop should detect this as an additional Ethernet network.
If you want to do it wirelessly, just connect your UT device to the same network as your desktop via Wifi. -
Still on your device, run "ifconfig" and check the IP address either wifi (wlan0) or usb (rndis0)
-
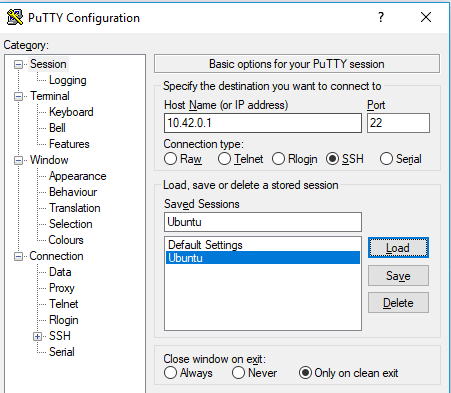
Back to PuTTY, under Session, put the IP address of your device in the field "Host Name (or IP address)". You may put a name in the field "Saved Sessions" and click Save if you want to save your settings and easily use in the future.
-
Click Open and if your IP address is right, you'll be asked for the username. Just type "phablet" and just answer yes if there are dialogs that will come up. If you do everything so far correctly, you'll be successfully logged in.
-
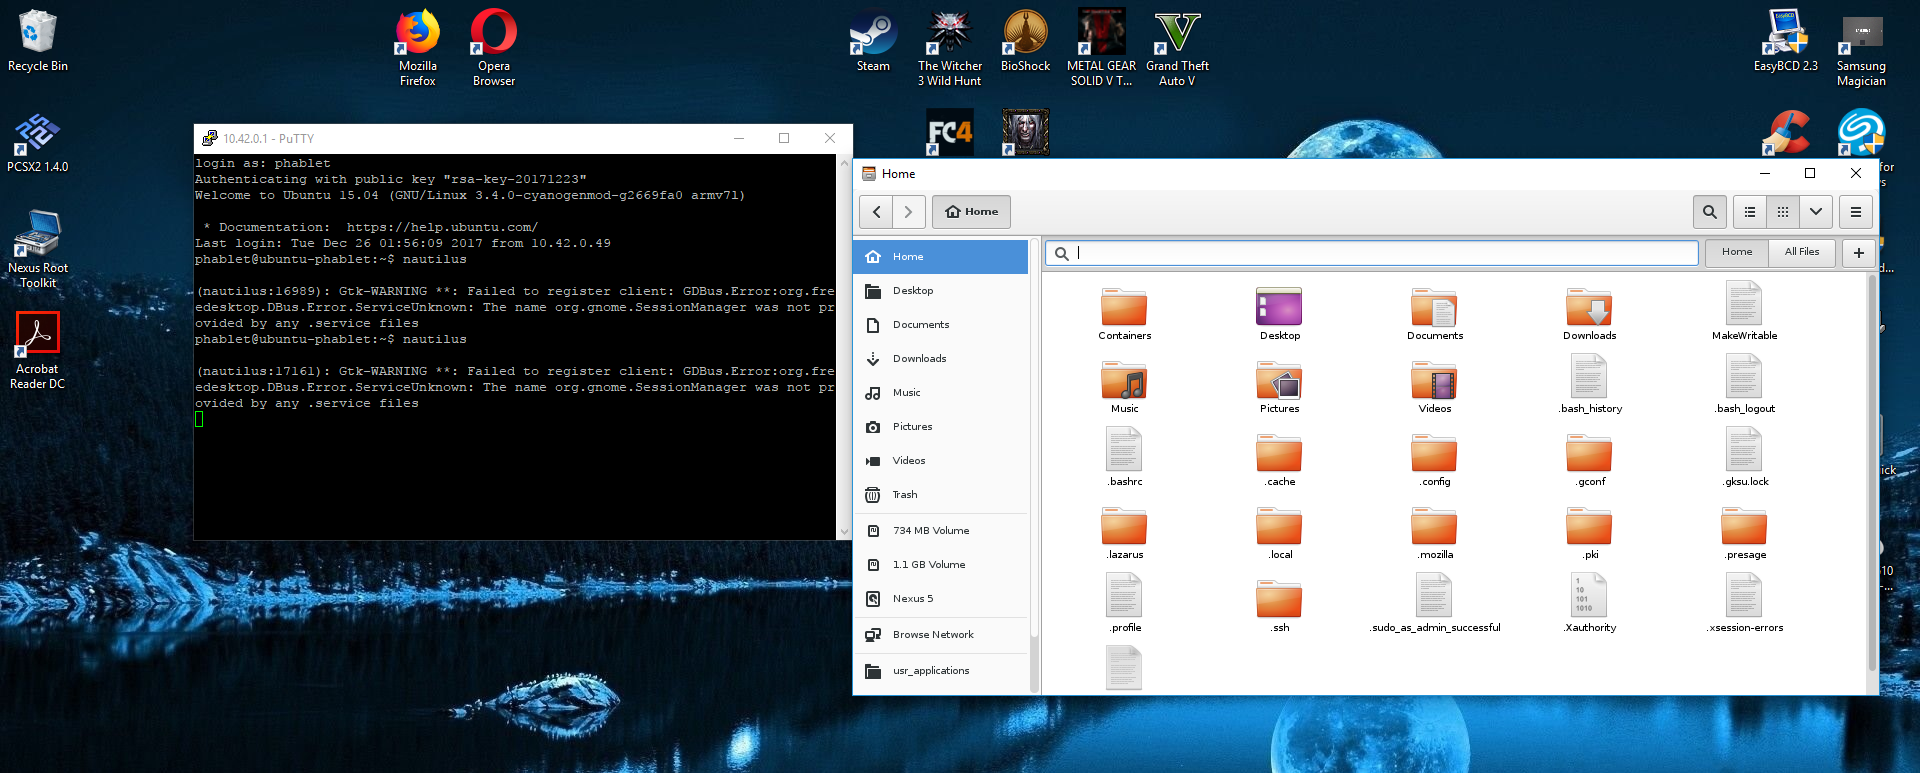
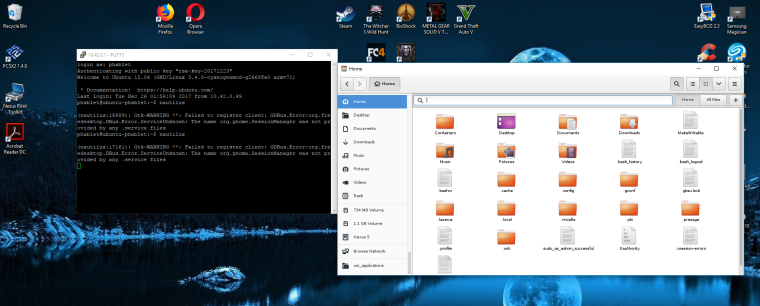
Open Xming and back in PuTTY, try opening any of your installed x apps like for example nautilus.
If you have questions or concerns, I'll try to answer them
CAUTION: Do this at YOUR OWN RISK and don't do THIS AT WORK like what I'm planning to do

-
Amazing information Kugi, thank you! As soon as I go back at work, I "WILL NOT USE IT" to open Ubuntu x-apps on Windows

Very good job indeed.
Merry Christmas!
Matteo